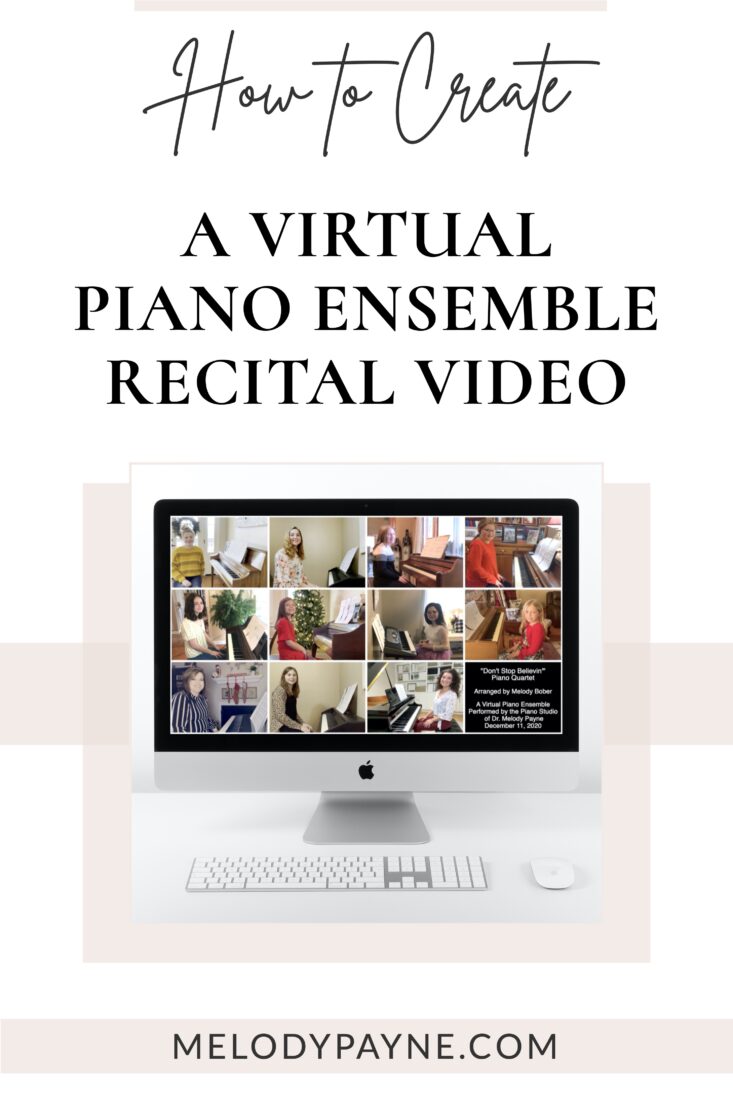
Ten of my students and I performed a virtual piano ensemble recital on December 11, 2020. All of our piano lessons leading up to this performance have been online. In fact, none of us saw each other in person during the entire time we were rehearsing and performing! It was all done via our online piano lessons by using lots of practice tracks, the metronome, videos, and powerful editing software.
In this post I’m going to share some tips for creating a virtual piano ensemble so you can create one for your students and give them a wonderful keepsake. This is a wonderful way to make virtual piano recitals fun, engaging, and exciting experiences for our students and their families!
What is a Virtual Piano Ensemble?
A virtual piano ensemble is a compilation video of individual videos of your piano students, that you have edited so it appears they are all performing live together. Many times, you’ll see the layout is in grid-format. This is probably the easiest (and most forgiving!) way to arrange your virtual ensemble video. Read the entire post and then you can enjoy our video at the end.

Can Anyone Record a Virtual Piano Ensemble?
Absolutely! This can be done by anyone who is comfortable with the technology that is required to put a virtual piano ensemble together. There are lots of ways you can accomplish this, and I used Logic Pro X and Final Cut Pro X for Mac.
How do I get started?
- Choose the piece you want your studio to perform.
- We decided to perform “Don’t Stop Believin'”, words and music by Jonathan Cain, Neal Schon, and Steve Perry, of Journey. Journey is one of my favorite bands, so this was a very easy decision! I saw a video of a piano quartet performing this arrangement together, and I immediately knew this was “the one”. This version was arranged for piano quartet by Melody Bober.
- Decide how you’d like to distribute the parts among your studio.
- My students range in age from 8 to 15, plus the two of us adults, and the 8- to 15-year-olds are elementary to early intermediate level, so I knew this arrangement would be attainable, but would also be a huge challenge for them!
- When I divided the parts of this piano quartet among my students, about half of my students and I played both right and left hands of one of the Primo or Secondo parts, and about half of my students played either a right hand part or a left hand part, so that all the parts balanced out when I put everything together.
- Choose the perfect tempo that will help every student be successful.
- Because several of my performers are very young (8 to 9 years old), we chose a slower tempo at a comfortable pace that worked very well for every single student, so everyone could participate in the performance.
- One of my goals for this virtual ensemble was that ALL of my students would play an important roll in the performance, and that nobody would be left out.
- All of my girls are absolute pros at using the metronome and practicing along with their practice tracks after working so hard on this performance!
- Record practice tracks with piano + metronome for each student.
- I turned on the metronome on my iPad and recorded videos with my iPhone. I found that if I used the metronome on my iPhone while recording, the metronome was way too loud in the practice video.
- Helpful hint: Use the same metronome on the same device for all recordings. Why? Because I learned during the editing process that the 80 bpm tempo that we had chosen was not 100% identical across all metronomes! Not a good surprise, I assure you! That added quite a few hours to my editing process. But now I know what to do next time to prevent this from happening!
- Helpful hint: Put your phone on airplane mode and disable notifications so incoming texts, emails, or other notifications don’t interrupt the audio as it’s being recorded.
How do I help my students learn this online?
- We currently meet for most of our piano lessons via Zoom. I love using the screen share functionality for online piano lessons.
- We spent lots of time making sure everyone was playing well with the metronome and counting as precisely as possible.
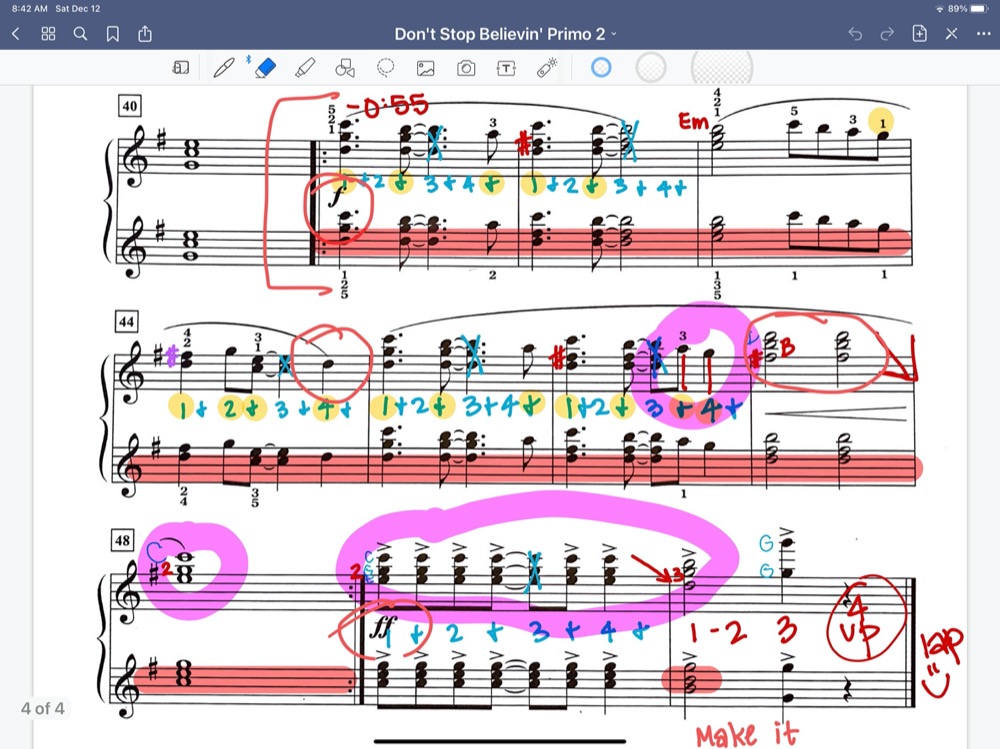
- We wrote lots of reminders on our scores: counting, dynamics, choreography at the end, etc. Take a look at this! 😀 I scanned my copy of the sheet music so I could use it like this in my GoodNotes app for iPad during online piano lessons.
- I have an iPad Pro 12.9″ 2020 version, with an iPad-compatible stylus pencil (basically, it’s an off-brand Apple Pencil that I wanted to try before splurging on the Apple Pencil 2!) that works fabulously. I LOVE this setup for online piano lessons! The annotations are automatically saved from week to week. This is incredibly helpful for me as a teacher, and for my students too!
- We practiced with the practice videos from very early on in the learning process.
- See the -0:55 at the top of the image below?
- That is the exact spot in the rehearsal video that this section begins.
- I wrote the time at the beginning of every section to help students find the correct spot to practice the individual sections.
- Students copied the times onto their scores, and using the timestamps helped with efficiency and autonomy during their practice sessions.
How to prepare for the performance
As you can see at the end of the piece in the image above, we practiced our choreography so we could look as much like we were performing together live as possible.
- 1-2-3-4/up – lap – 😀
- The numbers are the beats in the last measure, the “up” means to float their hands on beat 4, “lap” means put their hands in their laps. The 😀 means to smile at the camera for five seconds.
During the lessons leading up to recording week, we worked on floating our hands from our laps onto the piano keys, and we worked on releasing the final note, putting our hands in our laps, and smiling at the camera for about 5 to 7 seconds. This gave me a little bit of wiggle room when I was editing.
When it was time to perform, I wrote a script that I would read to my students on their recording track to help them prepare themselves for the actual performance. I added the audio file to their original rehearsal tracks and sent the new recording tracks the week before we recorded. Here’s my script:
- Make sure your piano and area around it are cleared of highlighters, pencils, other books, and anything else you don’t want in the video.
- Make sure your lamps are on so we can see you really well.
- Put your recital music in front of the piano keys where you’ll be playing. If your part is high, put the music on the right side of the piano. If your part is low, put it on the left.
- Are you wearing your headphones, earbuds, or AirPods? Make sure you have them in for the performance! Go ahead and put them in if you haven’t yet.
- Start the video, or ask the person who is helping you to start recording you.
- Scoot the bench back a little so you’re not squished.
- Sit up tall, with good posture, and stay tall for the entire performance.
- Now we’re going to clap together 4 times to help me edit the videos just right. 1 – 2 – ready – clap – (this helps me line up the audio tracks when editing)
- Clap
- Clap
- Clap
- Clap
- Thanks!
- Take a deep breath and smile.
- Get ready to float your hands up to the piano keys. 1 – 2 – ready – float –
- Now listen for the metronome and get ready to play along! You’re going to sound awesome!
- … (the metronome begins and the performance track plays)
- Smile at the camera for 5 seconds!
- 1 Mississippi, 2 Mississippi, 3 Mississippi, 4 Mississippi, 5 Mississippi!
- Ask your person to stop the video and send it to me.
- Thank you! We’re all done!
Helpful hint for performance prep: Ask your students to cut their music down the spine, or where it is folded. This way, they can spread the three pages out across their pianos. This eliminates the need for page turns, which cuts down on lots of unnecessary noise in the videos.
Helpful hints for performances:
- Remind your students to wear shoes if their feet will be visible in the video. Be specific with what you want them to wear, if you have preferences.
- Show them how you want their video to look. Tell them if you prefer horizontal or vertical videos. I prefer horizontal.
- Tell them how far away the camera should be placed from the piano. I like to have space all the way around the students in the videos. That helps with the editing.
- Ask them to place the camera on a stable surface instead of holding it. You can see in my final video that I forgot to ask parents to do this. It’s not very noticeable because the parents did a great job holding the camera still, but if they had moved too much, it wouldn’t have been possible to zoom in and edit the videos without the performer being cut off the screen.
- Tell them to dust their pianos and put away their other piano lesson materials or personal items that don’t need to be in the video.
- Ask other family members for complete silence during the brief recording session. You’ll be surprised how much background noise will be picked up while recording. I had to mute a measure or two of a few students due to loud background noises.
- Ask your students to put their phones on airplane mode and disable notifications during recording so incoming texts, emails, or other notifications don’t interrupt the audio as it’s being recorded.
- Ask students to disable HDR mode on their iPhones, record all videos at 1080p, and move the camera further away from the student instead of zooming out on the camera. This will make the video editing process easier for you, I promise.
- Schedule a “recording week” and a due date for the videos.
- Tell them when you plan to have the premiere go live on YouTube.
How do I collect my students’ videos?
Have your students send the videos through cloud storage. If students try to text or email the videos to you, the videos will be compressed and the quality will be compromised.
Ask them to share with you through Google Drive, Dropbox, iCloud Mail Drop, etc. You want the audio and video quality to be as high as possible for best results of your final project.
Are you ready to create a virtual piano ensemble?
Making a Virtual Ensemble website is dedicated to tutorials for creating a virtual ensemble. It was created to show how to make virtual choir videos, but I was able to use the information to make a virtual piano ensemble. I encourage you to watch all the videos and decide if creating a virtual piano ensemble is something you’d enjoy doing.
If the answer is YES, then you can follow the tutorials on that website, and you’ll have a beautiful and memorable video that you and your students can enjoy and treasure.
If the answer is NO, there are people who are willing to do the work for you, in exchange for money, of course 😀 You’ll have a beautiful video, but you won’t have to do the work to get it.
The Truth About Audio Files
Here are two audio snippets: The first one is our unedited audio immediately after I imported all the audio files, and the second one is our edited audio, after a lot of work. You can hear how our pianos are WAY out of tune with each other in the unedited snippet. What did I do? I followed the audio editing and mixing ideas from this tutorial so it would sound much better on the final video! You can compare the two below:
Unedited audio snippet:
Edited audio snippet:
I feel very good about the results of the edited audio!
In my experience, a well-done virtual piano ensemble video requires a LOT of work when the videos are recorded by a dozen different individuals recording on a dozen different devices in a dozen different situations. Some students will anticipate the beat, some will play at the end of the beat. However, spending time editing with the “slice and dice” feature I mentioned will really clean up the places where the beat doesn’t line up.
Helpful hint about audio editing: When editing your audio, definitely use the “Slice and Dice” section of the tutorial to your full advantage. It GREATLY improves the synchronization of downbeats and cleans up the performance quite a bit.
Helpful hint about slicing and dicing: Zoom WAAAAAAAY in to your audio file so you can edit things very precisely and meticulously. This makes a world of difference in the final results, as you can hear in the audio snippets above.
The Truth About Video Files
When you import your video files, they might not be 100% in sync. A few edits solved this issue for me, but I wanted to make you aware of it.
I could have shared version 1, 2, or 3 of my recital video, but I wouldn’t have been happy sharing those results, so I continued tweaking, editing, and trying to make it sound better and trying to make the videos perfectly synced with the sound.
Is my result perfect? No, but in my opinion, perfection is not always a healthy thing to try to attain. I was able to create a wonderful video that is a beautiful keepsake for my students and their families, and I still have my sanity after 20+ hours of working on this project during the week leading up to the premiere!
I learned SO much throughout this process, and I’m confident that the next time we do a virtual piano ensemble, it will probably take only half the time to edit.
Helpful hint about video editing: If your video and audio aren’t in sync, you can “blade” the video (this means “cutting” the video track”) and line it up with the audio. I did this with each person’s individual video as I added it to the main project video. It takes time, but it’s worth it to make the final video as synchronized as possible.
Licensing
Before you publish the video to your website or YouTube channel, be sure you pay for the proper licensing. This is extremely important. Visit this page to learn how to apply and pay for licensing. It’s a very easy process and will ensure that you have the proper permissions for posting performances of copyrighted works online.
Sharing the News about your Virtual Piano Ensemble
Throughout the week as I was editing the audio and videos, I shared periodic posts on Facebook to get my students’ parents excited about how the project was going. Here are a few of my teaser posts.
On the first day of editing, I posted this image of the video editing software after I had imported the audio files.

On the 2nd day of editing, I sent photos of each student to their parent.

On the third day of editing, I shared a sneak peek of the grid of videos.

On the fourth day of editing, I shared another teaser post of the audio editing process.

On the fifth day of editing, I shared the bottom portion of the text below. Then, when the video was uploaded to my YouTube channel, I added the YouTube share link and an update to the top of the post.
🎵 And a partiridge…. in a pearrrrr treeeeeeeee! 🎵

Publishing the Video
I uploaded the video to my YouTube Channel, set it to premiere at 7:00 p.m. the evening of the upload, and shared the link on my Facebook page and via text and email to my studio families so they would be prepared to watch when it went live. This made it a fun event and increased the anticipation just a little bit more!
I received some very sweet photos from my studio moms. They shared photos of their kids “camped out” in front of the laptop waiting for the recital to begin, and they shared photos of the recital video playing on their large screen TVs as they watched together as a family. My heart was so full!
The Virtual Ensemble Recital Video
Many, many heartfelt thanks and much love to my students and their parents and other supporters and caregivers for making this virtual ensemble recital possible! I couldn’t be more proud of how hard my beautiful students worked on this project, how well they performed, and how much they have grown throughout this process!
Other blog posts about online teaching ideas


This Post Has 8 Comments
Hi Melody
I just chance on your website and I’m inspired by your virtual recital. Did your students record all their parts and you put all the parts together? Thank you
Thank you so much, Su! Yes, my students each recorded their own performance, and I put them all together. They were listening to the metronome through their Air Pods. This helped them all perform at the same tempo. It took awhile, but it was worth it! 🙂
Hi Melody- this is inspiring. Please can you confirm the name of the Melody Bober Book Her publications aren’t easy to get to NZ so am hoping to see what else might be in her book and order a copy. thanks
Hi Karen – Absolutely! It’s an ensemble piece called “Don’t Stop Believin'”, and it’s an arrangement for 2 pianos, 8 hands. It’s not in a book as far as I know, but the ensemble can be purchased by itself. Here’s a link to it on the Alfred.com website. Hopefully that will help all the way in NZ 🙂 https://www.alfred.com/dont-stop-believin/p/00-40156/ It might be worth reaching out to Alfred Publishing to see if they have a digital version you could purchase online. Hope this helps! Have a terrific day!
Very inspiring.
Well done indeed!
Thanks, Maggie! This was one of my favorite projects, and several of my studio families’ favorite recital ever!
Loved listening to your video of your students playing all at once. Our association does this called the Multiple Piano Festival annually and we actually put it on virtually in 2020. First time ever doing it, but turned out pretty good.
I love the idea of doing a studio recital like this in a piano quartet. Most likely we are able to play in person once again, but it definitely helps to know how to do this if we ever have to all go virtual again. Thanks for sharing.
In case you want to see our youtube of the virtual recital, here is the link. Feel free to scroll through it since it’s very long with student intros as well.
https://www.youtube.com/watch?v=AnUF1gLmOZk
Thanks so much, Amy! I’m truly hoping we can all be in person before much longer, but it’s wonderful to have the technology available to create virtual ensembles and host virtual performances while we can’t be together 🙂 Looking forward to watching your students perform!