Create An Easy DIY Piano Bulletin Board for Your Piano Studio
This post may contain affiliate links. If you purchase something through an affiliate link, I will receive a small commission at no cost to you. For more information, read the disclosure statement here.
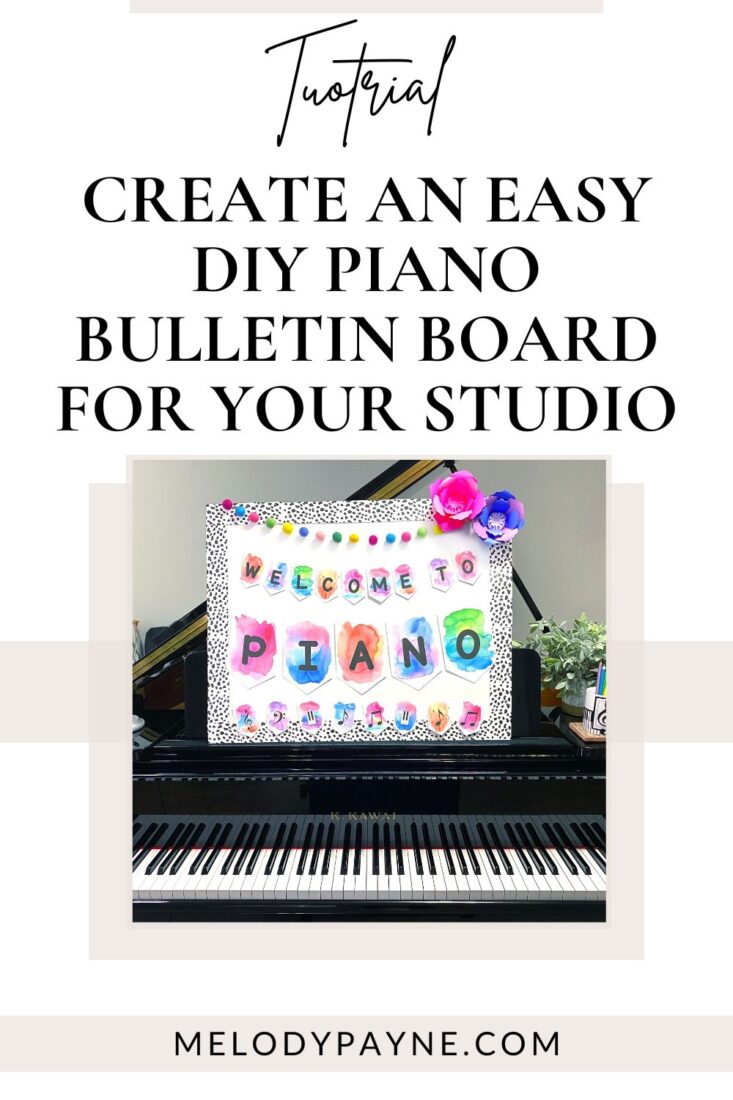
Is your piano studio in need of some freshening up? Are you looking for an easy piano studio board that will make a statement, even in very small spaces? Do you need the perfect way to welcome your students to lessons? Then you need your own DIY piano bulletin board!
Why Do You Need a Piano Bulletin Board?
- A studio bulletin board is a great place to make a statement, even if you have a small studio space.
- Bulletin boards are simple pieces of decor that are easy and affordable to change out as frequently or infrequently as you like.
- You can post important studio information on your studio bulletin board.
- A bulletin board is a great place to share your studio-wide incentive program progress charts, word of the week, composer spotlight, and more (looking for challenges to put up there? Check out How To Host A Piano Practice Challenge and Develop Strong Sight-Readers with “The Great Sight-Reading Challenge”)
- Bulletin boards are fun, inspiring, motivating, and a terrific way to welcome our students back to lessons after a break!
Materials for Your Piano Bulletin Board
Here’s a list of materials that I used to create my quick and easy bulletin board. (Note: If you purchase something through an affiliate link, I will receive a small commission at no cost to you. For more information, read the disclosure statement here.)
- Rainbow watercolor “Welcome to Music, Piano, Choir, Band, Orchestra!” bulletin board letters or any banner or set of bulletin board letters
- A cute border for your bulletin board (the dots border in the photo is included in the Rainbow Watercolor Welcome Banner)
- White foam board in any size (I used 22″x28″ for my small piano bulletin board)
- White card stock
- Laminator (I have a Swingline) and laminating sheets (optional; I didn’t laminate mine so I could photograph it for you more easily)
- Tape or hot glue gun and glue sticks (I couldn’t find my glue gun so used Scotch gift wrap tape)
- Scissors or paper cutter
- Pompom garland (optional)
- Paper flowers DIY template or ready-made paper flowers
- Colorful card stock if you choose the DIY paper flowers (Astrobrights is my favorite)
- If you really want to amp it up and create a full-sized piano bulletin board like this one, grab this awesome bulletin board background and use it instead of the foam board! (Details about this background are in a video at the end of this post!)
- For the larger board below, which is 3’x5′, I made flat portraits of my students using the Procreate app on my iPad, but you could also use photos or have them draw self-portraits!
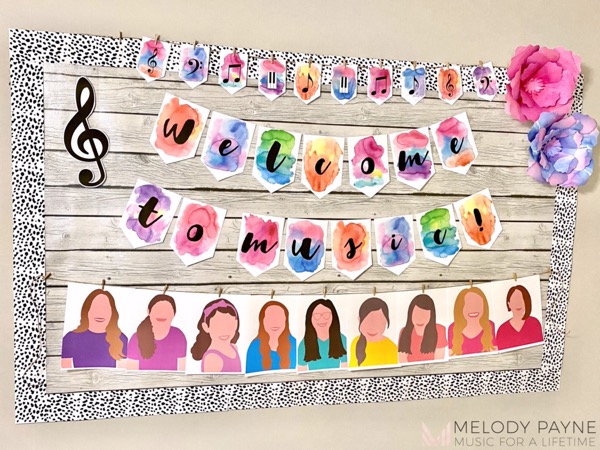
Print the Pieces of Your Bulletin Board
Here are some tips to make printing your bulletin board pieces easy.
You can see in this photo that the letters for “Welcome To” are much smaller than the letters for “Piano”. Here’s how to adjust your printer settings to make the size of your bulletin board letters fit any space.
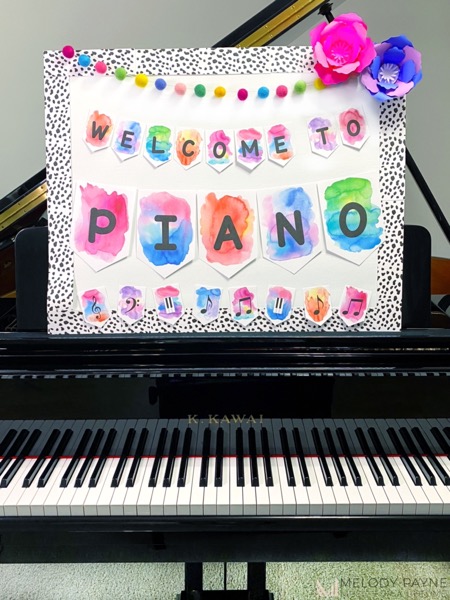
Option 1: Print the Piano Bulletin Board Letters in Different Sizes
- Follow these steps only if you want to print your letters the smaller size that you can see in the photo above. If you have a larger space and want all of the letters to be the larger size of “Piano” in the photo above, skip to the next section.
- Open the PDF document of the Rainbow Watercolor Welcome Banner.
- Show the thumbnails by selecting “View” in the menu, then select “Thumbnails” (I’m using Preview for Mac, so yours might be just a little different).
- In the thumbnail sidebar, select the “Welcome To” text by holding the Shift key and clicking those pages.
- Give the Print command (“Command P” on Mac, “Control P” on Windows).
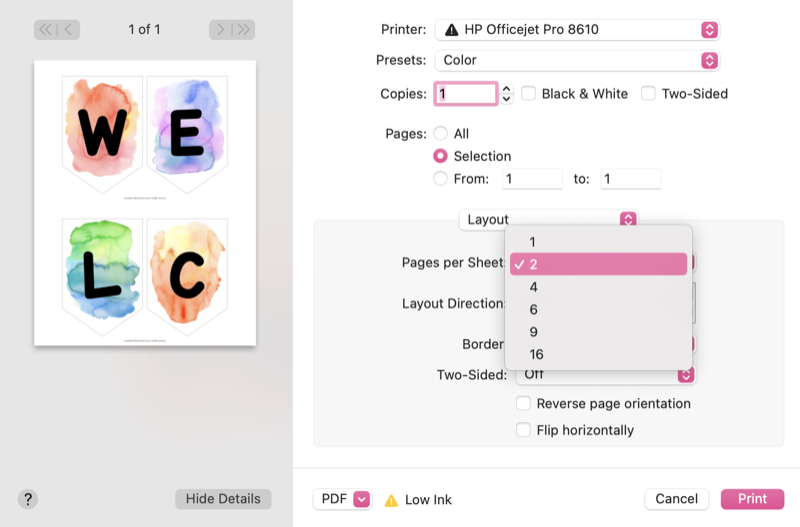
- In the print settings window, select “Layout” from the dropdown.
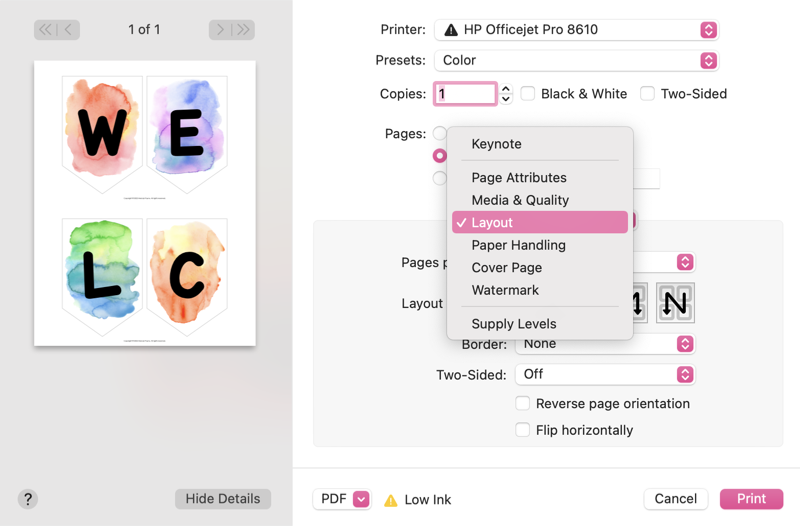
- Change “Pages Per Sheet” to 2.
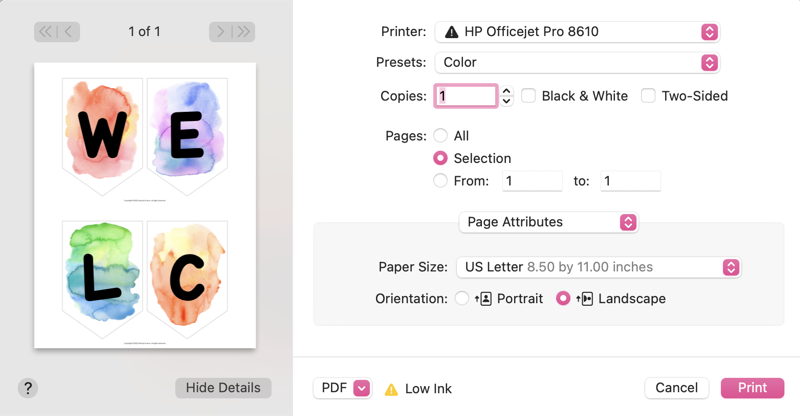
- Select “Page Attributes” from the dropdown and change the orientation from “Landscape” to “Portrait”.
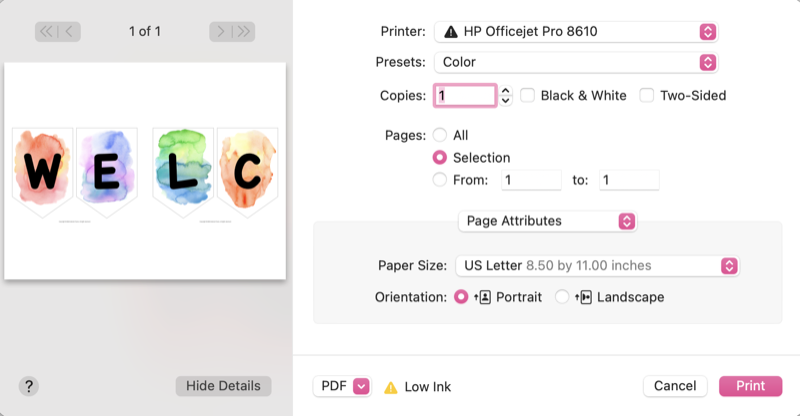
- Print the pages: “Welcome To” onto white card stock.
- Repeat this process if you want small music symbols like you can see at the bottom of my bulletin board.
Option 2: Print the Bulletin Board Letters at Full Size
- Open the PDF document of the Rainbow Watercolor Welcome Banner.
- Show the thumbnails by selecting “View” in the menu, then select “Thumbnails” (I’m using Preview for Mac, so yours might be just a little different).
- In the thumbnail sidebar, select the “Welcome To Piano” text by holding the Shift key and clicking those pages.
- Give the Print command (“Command P” on Mac, “Control P” on Windows).
- Print onto white card stock.
- Repeat this process if you want large music symbols like you can see at the bottom of my bulletin board.
How to Print the Border For Your Piano Bulletin Board
- In the same PDF document, choose the border you want for your bulletin board (I used the dots border in the 2-inch size for my small piano bulletin board, and I used the dots border in the 3-inch size for my large bulletin board).
- Select that page, give the print command, select the number of copies you need, and print onto white card stock.
- I printed 4 copies of that page to have enough border for my bulletin board.
- If you want a colorful border, you could use strips of the Astrobrights colorful card stock
Put Your Piano Bulletin Board Together
- Cut out all of the piano bulletin board pieces: Border, letters, music symbols, etc.
- Laminate if desired.
- If your bulletin board is a piece of foam board like mine, place it on a table (or the floor, which is my preferred crafting space 😁), then arrange all of the pieces until they’re exactly where you want them.
- Once everything is in place, secure the pieces to your bulletin board by taping them, stapling, gluing, or whatever you’d like to use. I used FrogTape painter’s tape.
- Complete the bulletin board with colorful garland or these bold and bright easy diy paper flowers. (You can change the size of the flowers by following the Option 1: Print the Bulletin Board Letters in Different Sizes tutorial above. I printed mine at about 1/6 the size of the original template so they would fit perfectly on my tiny bulletin board. I printed them at 50% size for my large bulletin board which is 3’x5′, and it took 7 sheets of card stock per flower.)
- Enjoy!
Want to See the Process in Action?
Here’s a very short video I created as I put my piano bulletin board together.

Have Questions about the Wood Bulletin Board Background?
Check out the details in this video!

Get your piano studio prepped for a new teaching year with these other ideas…
Don't miss out!
Follow on Facebook and Instagram, join the best Facebook group for piano teachers, and subscribe to the newsletter to get helpful teaching tips, resources, and tutorials delivered straight to your inbox every week.
Melody Payne
Melody Payne
Welcome!
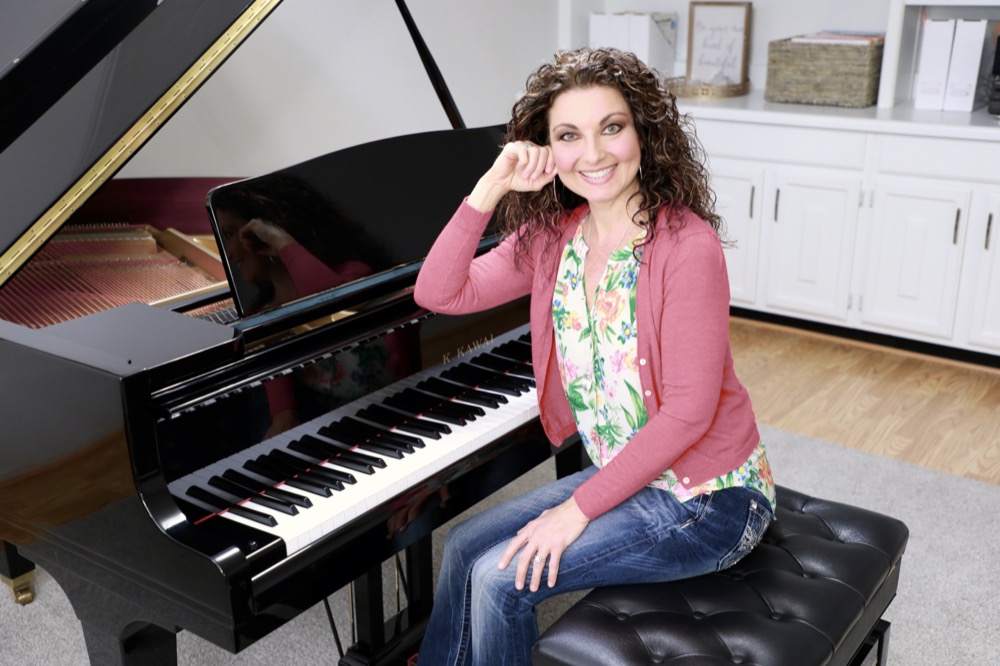
Hi! I’m Melody Payne, a pianist and piano teacher, educational resource author, a fun-loving wife to the most wonderful and talented hubby I could ask for, and a lifelong learner who loves to share. I want to make your life as a music teacher easier by writing and sharing helpful and relevant music teaching articles, and by creating educational resources with your very own students in mind. If you are a parent who wants to enroll your child in piano lessons, I’d love for us to get started building those skills that can give your child a lifetime of musical enjoyment!

